To 'Create a segmentation' go to 'Manage Segmentations'
( Catalog> Profiles > Manage Segmentations)
There is a difference between 'Creating a segmentation' and
'Adding a contact to a segment':
-
By 'Creating a segmentation', you will create the structure
to collect the information.
-
By 'Adding a contact to a segment', you will determine that
a profile belongs to a segment.
Tip
Segmentations are no longer created through the 'Manage DB
structure' app. They now have their own app.
Navigating the 'Manage segmentations' app
The 'Manage segmentations' app displays all the existing
segmentations from all the DBs of your licence.
This screen displays the name of each corresponding segmentation,
its type, the related database, the segments it is made of and its
creation date.
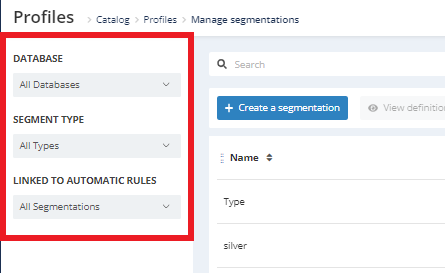
Through the filters to the left, you can choose to only display
segmentations related to one specific database, choose the type of
segmentation to display (simple or exclusive), and to choose to
display the segmentations that have a - or do not have -
active automatic rules.
Creating a segmentation
Click on 'Create a segmentation' to set-up a new segmentation in
any database.

Step 1: Type of segmentation
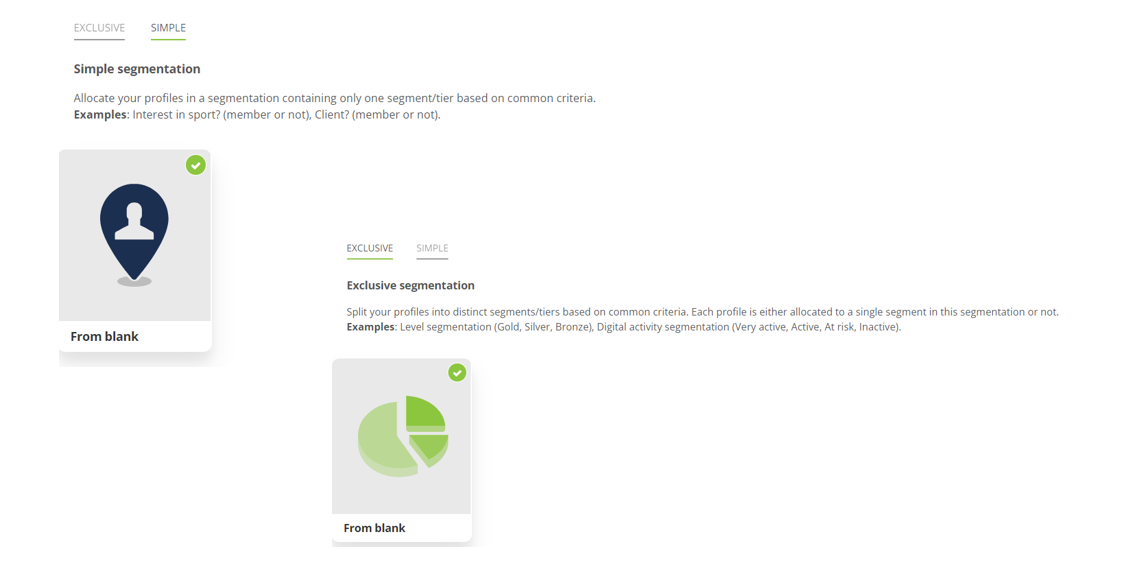
You will have to choose between a
simple segmentation and an
exclusive segmentation.
Choose the relevant tab, click on 'From blank', then on 'Next'.
Info
There's a difference between 2 kinds of segmentation in
Actito:
-
A simple segmentation groups
together all profiles with a
common characteristic. They
are either member of the segmentation, or not. For
example: in an 'Active' segmentation, a profile is
either active, or does not belong to the
segmentation.
-
An exclusive segmentation
groups together profiles that
belong in a type of classification that contains
various segments. For example: a 'Client type' segmentation will consider
all profiles who are already clients, then break them
down into tiers like Gold/Silver/Bronze.
Step 2: Segmentation parameters
To define a segmentation, you will have to
-
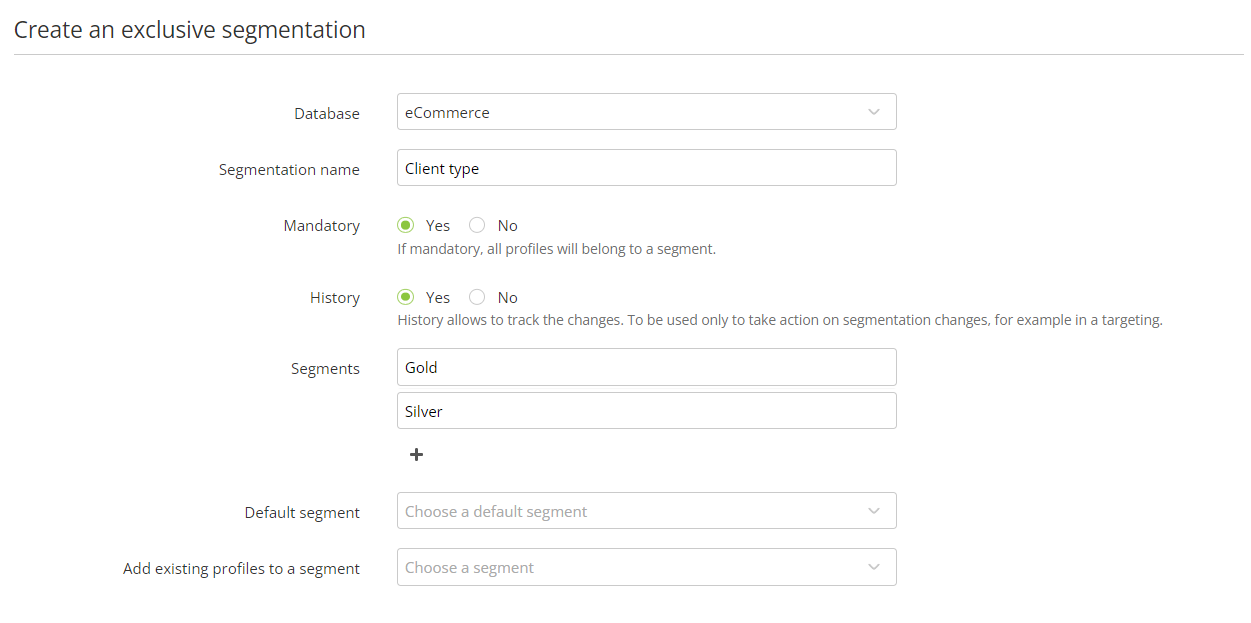
select the database to which the
segmentation will be added
-
define the
name of your segmentation
-
determine if you want to track the
history of the arrival of the
profile in the segmentation/ its transition from a segment
to another one. This is mandatory if you want to create
marketing actions based on the transition from a segment to
another one (for example: to target every contact who moved
from 'potential customer' to 'customer')
Exclusive Segmentation
Details of the step if the chosen type of segmentation
is
Exclusive
Tip
Making your exclusive segmentation 'Mandatory' will allow
your automatic segmentation rule to be both simple and
optimal by using the
'Add' action.
-
Segments: an exclusive
segmentation is made of sub-categories, named 'segments'.
A least two segments are required (otherwise, creating a
simple segmentation is advised).
-
Default segment: if a new
profile is created without being assigned a specific
segment, they will automatically belong to the default
segment.
-
Add existing profiles to a segment: allows to assign a segment to all profiles already in
your database.
Simple Segmentation
Details of the step if the chosen type of segmentation
is Simple
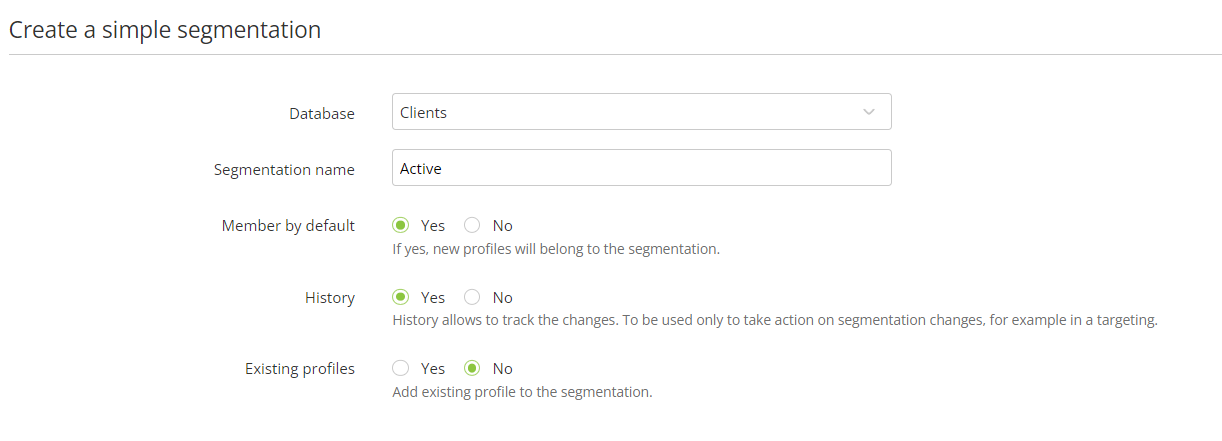
Tip
If you check the "Member by default" box, every
new profile will be automatically added to the
segmentation right after their creation without taking
into account any
automatic segmentation
rule in place for this segmentation.
This means that a profile will be added to the
segmentation even if it does not fit the criteria defined
in the rule. Profiles who do not fit the criteria will
only be removed from the segmentation (as long as you
selected the "Match" action) when the
segmentation rule is triggered (once per day).
In such a case, it is important to keep in mind that there
will be a delay between the
profile import and the next rule execution.
Step 3: Creation
To finalize your segmentation, click on the 'Create' button in
the bottom right corner.
It will launch the creation. Once completed, you will go back to
the screen displaying the existing segmentations, where you will
see this new segmentation.
If you chose to add existing profiles to the new segmentation,
your database will be automatically synchronized.
Adding a profile to a segment
After the creation of your segmentation, there are several options
to specify that a profile belongs to a segment:
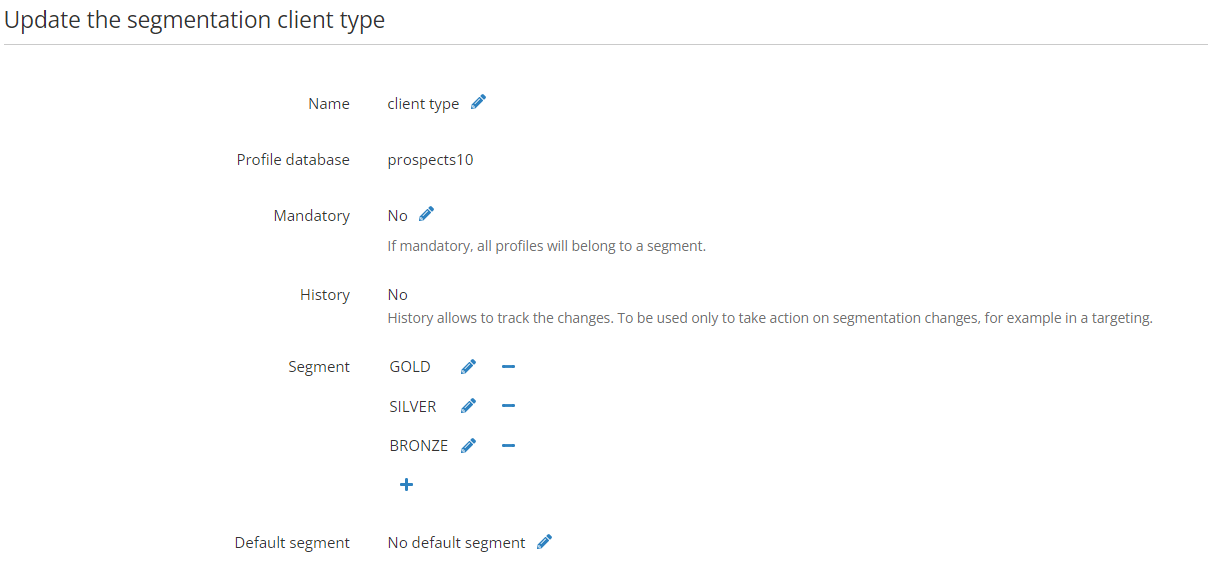
Updating a segmentation
By selecting a segmentation and clicking on 'Update', you will be
able to edit several characteristics of an existing segmentation.

You can update:
It is not possible to change the database linked to a
segmentation, or to activate the segmentation 'History' if it was
created without.
Viewing the definition of a segmentation
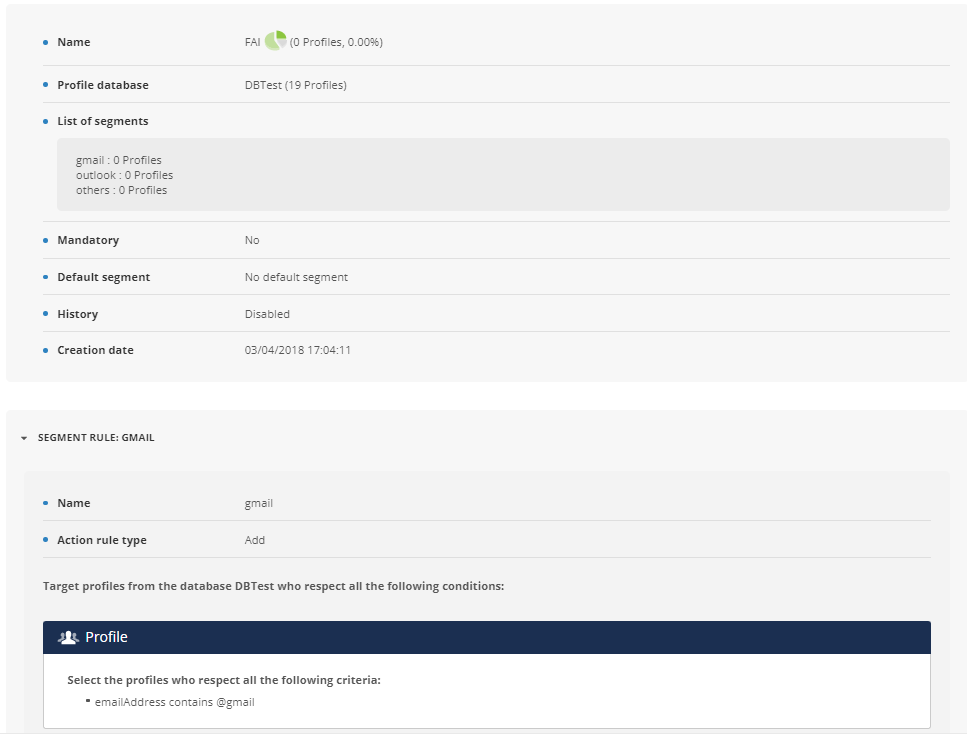
By selecting a segmentation and clicking on 'View definition', you
will get its details, namely:
-
the characteristics of the segmentations (if it's mandatory,
historicized, has a default segment,...)
-
the number of profiles from your DB who belong to the
segmentation, and the breakdown for each segment of an
exclusive segmentation
-
the rules that feed each segment. As said above,
automated rules
are created in a different app. However, the 'View' button
gives you an overview of your rules directly in the 'Manage
segmentations' app. This allow you to easily find how your
profiles are assigned to each segment.
Manage segmentation rules
By selecting a segmentation and then the 'Manage Segmentation
Rules" button, you get a redirect link to the app for setting
up automatic segmentation rules.
You will be redirected to the 'Manage Segmentation Rules" app
with the prefilled filters, so that you only see the rules related
to the segmentation you selected (a segmentation can be linked to
several rules: for example, one rule per segment for exclusive
segmentations).


