Saving and reusing a targeting
In Actito, a targeting can be saved and reused several times so that you can avoid having to define and set the same targeting conditions over and over again. This is usually useful to represent a population group with common characteristics.
A saved targeting and a table segmentation can indeed seem very similar concepts, but there are basic differences between them. For example, a profile cannot be manually added to a saved targeting, whereas it can be added to a segment. On top of that, reports do not show if a profile is included in a saved targeting or not, so it is not possible to monitor profiles depending on their belonging to a given targeting. Segmentations, on the contrary, are indeed mentioned and monitored in reports. Using a saved targeting is like applying a filter on our profiles, but it's not like creating a stable group of profiles.
Targets are dynamic and recalculated every time they are used. This means that a profile that was yesterday in one of our targets can be left out tomorrow if it stops matching the targeting conditions.
Defining and saving a target
To define and save a targeting, go to the 'Manage targeting' app (Catalogue > Profiles > Manage targeting) .
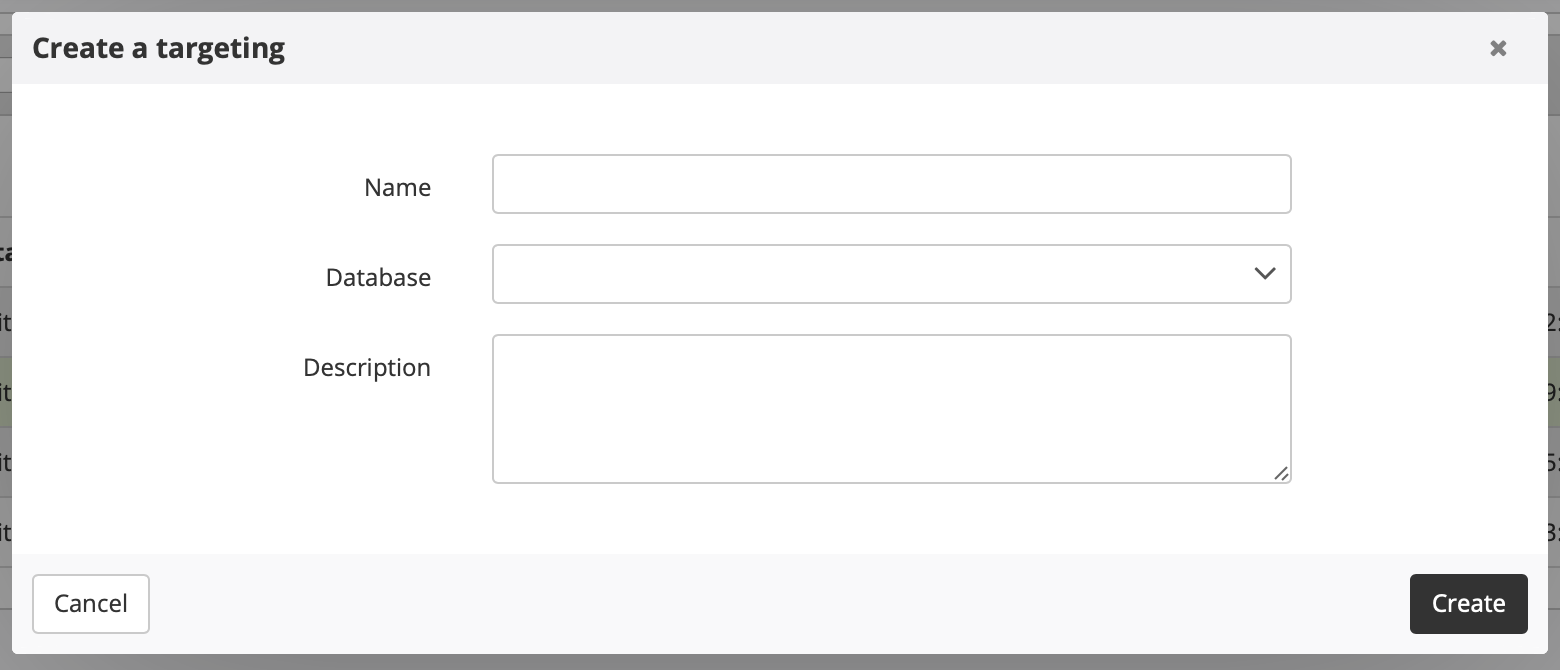
The first thing that you will need to do is to specify the targeting name and its database. Naming the targeting will make it easier for you to search for it, identify it, and reuse it in the future. The field 'Comment' allows you to state any information that you might consider relevant. Next, click on 'Create'.

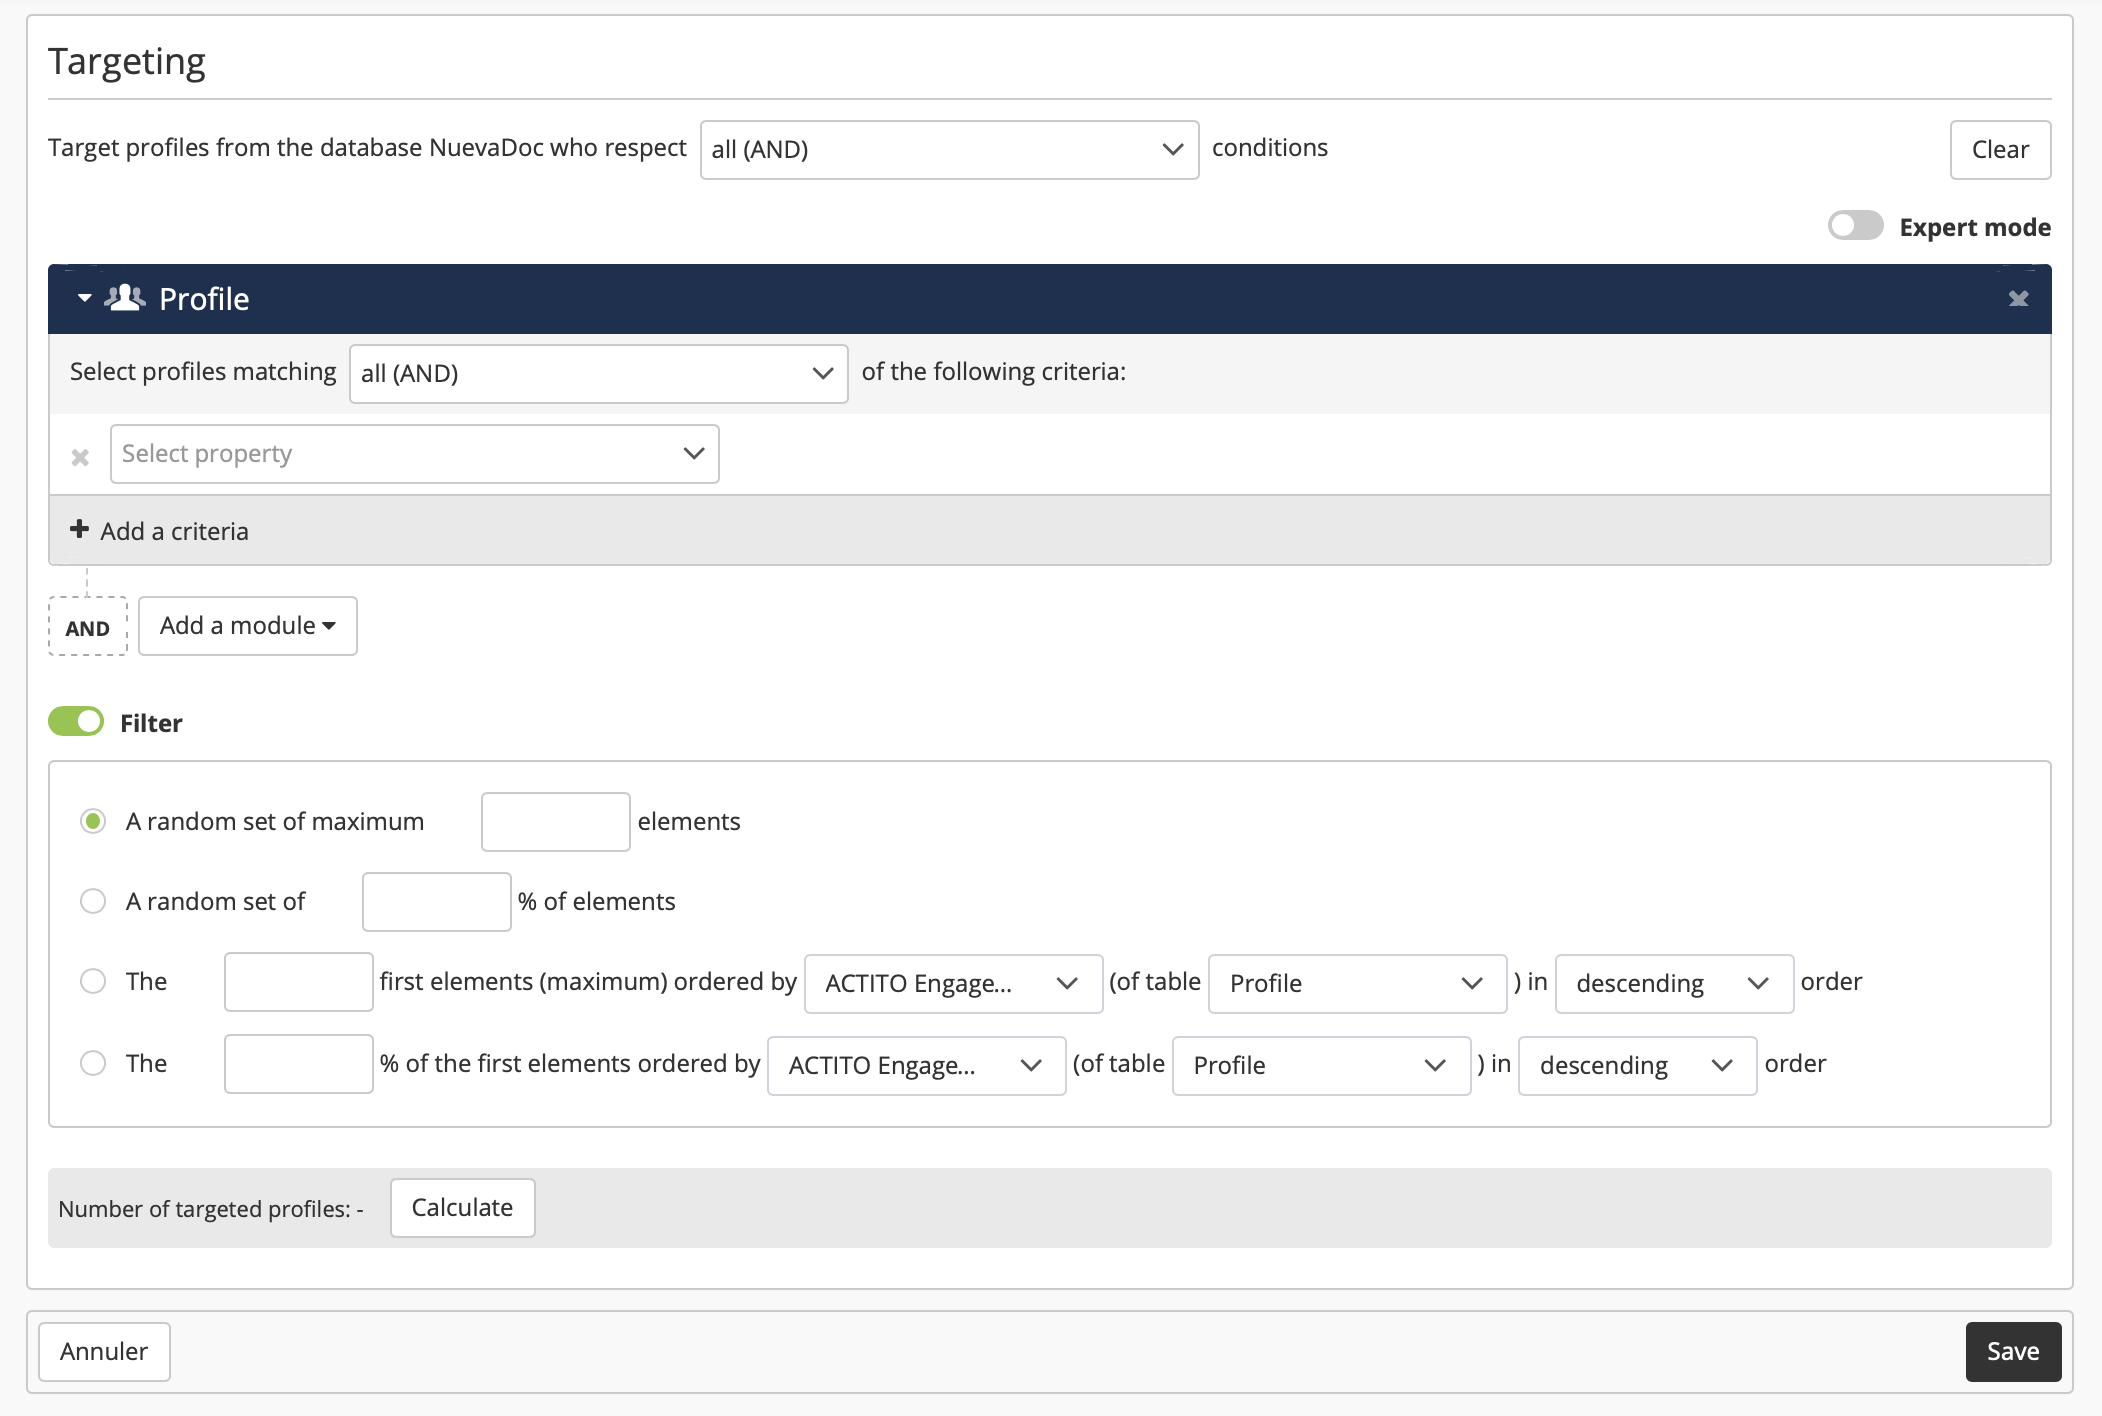
You will now see the targeting module definition screen, where you should set the targeting conditions that you want to save and reuse in the future. You can be as accurate as you wish, the only restriction is a maximum limit of 50 modules. If you need help because you don't fully understand how modules work and how to use them, we invite you to read the chapter on targeting modules. You also have the option to limit the number of profiles targeted.

Once you are done and you have set all the targeting conditions, you only need to click on 'Save'.
Your saved targeting is now ready to be used at any moment. Remember that on the 'Manage targeting' app you can always modify it, edit it, copy it, or rename it.

Using a saved targeting
A saved targeting can be used in SMS, email, or print campaigns, as well as in scenarios or even as the base of a much more complex targeting.
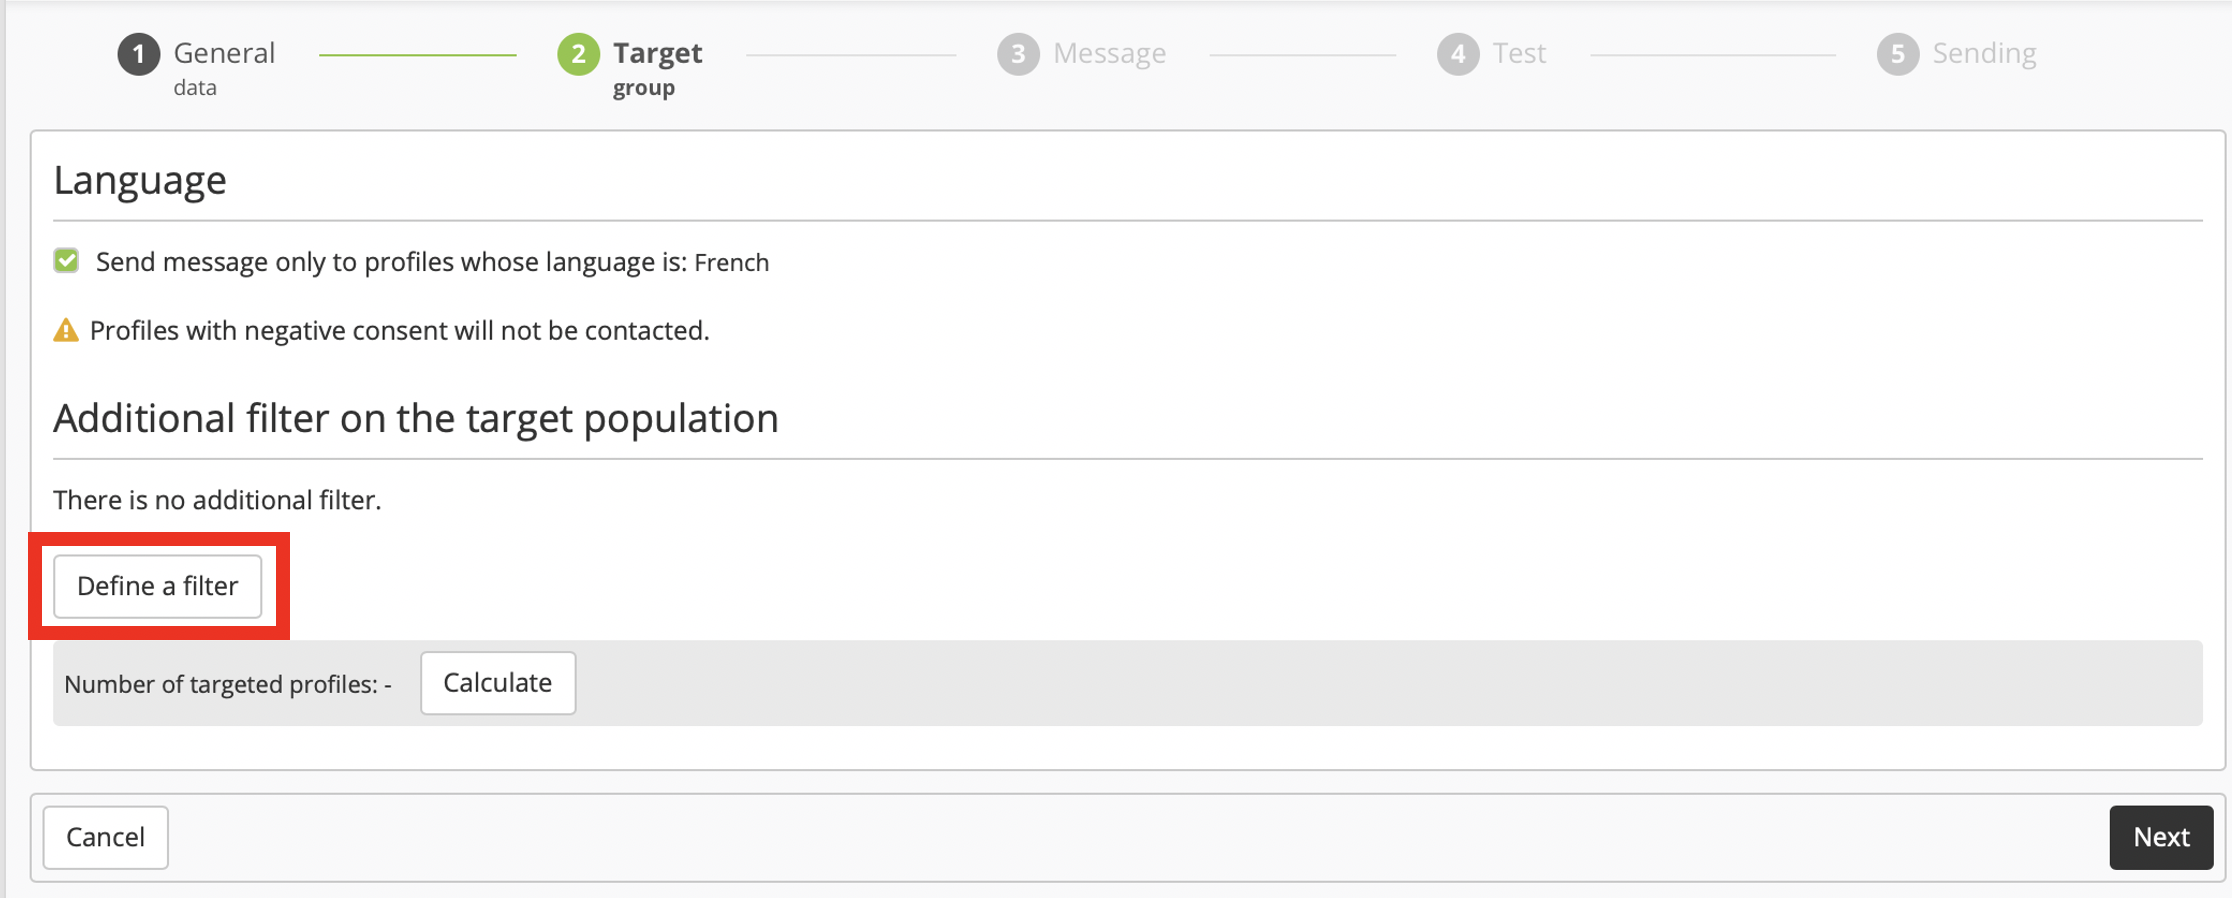
To use a saved targeting in a campaign, you need to click on 'Define a filter' in the second step of the campaign creation process. In the image below you can see an SMS campaign, but this step is similar for all the campaigns.

Next, you'll have to add a targeting module. You can choose either to target the profiles matching the targeting conditions ('are') or the profiles not matching the conditions ('are not'). Then, search for the targeting name, select the relevant targeting, and click on 'Validate'.

Updating a saved targeting
Saved targetings can be updated. Select the targeting that you want to modify and click on "Edit".
You can now update the criteria used in your targeting. Your modifications will not be applied until you "Save" them.

For this reason, updating and modifying a saved targeting must always be done carefully.
Let's see a more concrete example. Let's say that we usually launch personalized campaigns for young customers living in Paris. In that case, our saved targeting would have two criterias: one on the age (under 25) and another one on the address (Paris). This targeting "Parisians under 25" would be used, in particular, in five transactional campaigns and three scenarios.
If one day we were to send a one-shot campaign for Parisians under 20 and, and instead of defining a new targeting, we were to modify the existing targeting "Parisians under 25", we would also impact the five transactional campaigns and the three scenarios.
