Data Imports
Actito gives you several options to import data in the tables of your data model.
You can of course manually import profiles or custom table entries yourself in the interface, but if you want to automate these data flows, you are most likely using ETL synchronizations or API imports set up by your technical operators or by the Actito teams.
While you can receive an execution report, it is also interesting to be able to visualize these synchronizations directly in the Actito platform. That's what the 'Manage imports' app is here for!

Just like the 'Manage exports' app allows you to visualize your data flows OUT of Actito, the 'Manage imports' app helps you visualize data flows INTO Actito.
You can reach this app from the Catalog (Profiles > Manage imports) or from the 'Manage exports' app.
Understanding the filters
In the top left corner, you can choose to display only the imports on a specific table.
As data can be imported in profiles or custom tables, first choose the type of table, then select the table name in the dropdown list.
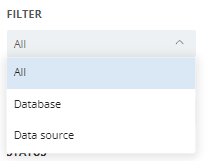
ETL synchronizations can be multi-file, meaning that the same definition triggers imports in several tables.
In this case, the import will appear when you select any impacted table in the filter.
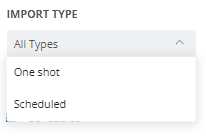
You can also filter on the type of import:
-
One shot imports are all imports for which the frequency is not defined in Actito: manual profile or custom table imports, and mass imports by API (API imports might be programmed on your side by your developers, and therefore be scheduled in some sense, but this scheduling is not defined within Actito so they count as one shot). The file transfer type is manual if the import is made in the interface or provided directly in the API call, or it can be in the cloud if the API call is programmed to retrieve the file on a FTPS.
-
Scheduled imports are all import for which the frequency is defined in Actito, meaning that as soon as an execution is finished, the next execution is already scheduled: this includes only ETLs synchronizations. For such imports, the file is always retrieved in the cloud.
For scheduled imports, the technical name of the ETL synchronization will be displayed in the Name column.
For one shot imports, you don't give a name to manual imports in the interface or by API: the Name column will remain empty.
Understanding the statuses
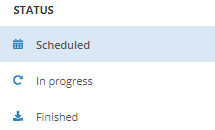
Navigate through the Scheduled, In progress and Finished tabs to see the different statuses of executions.
Scheduled executions
This tab only contains scheduled imports with files transferred in the cloud, so ETL synchronizations.
This allows to easily check when the next synchronization is going to run.
As soon as a daily execution has finished running, the execution of the next day is created.
This tab only displays the very next execution of a synchronization.

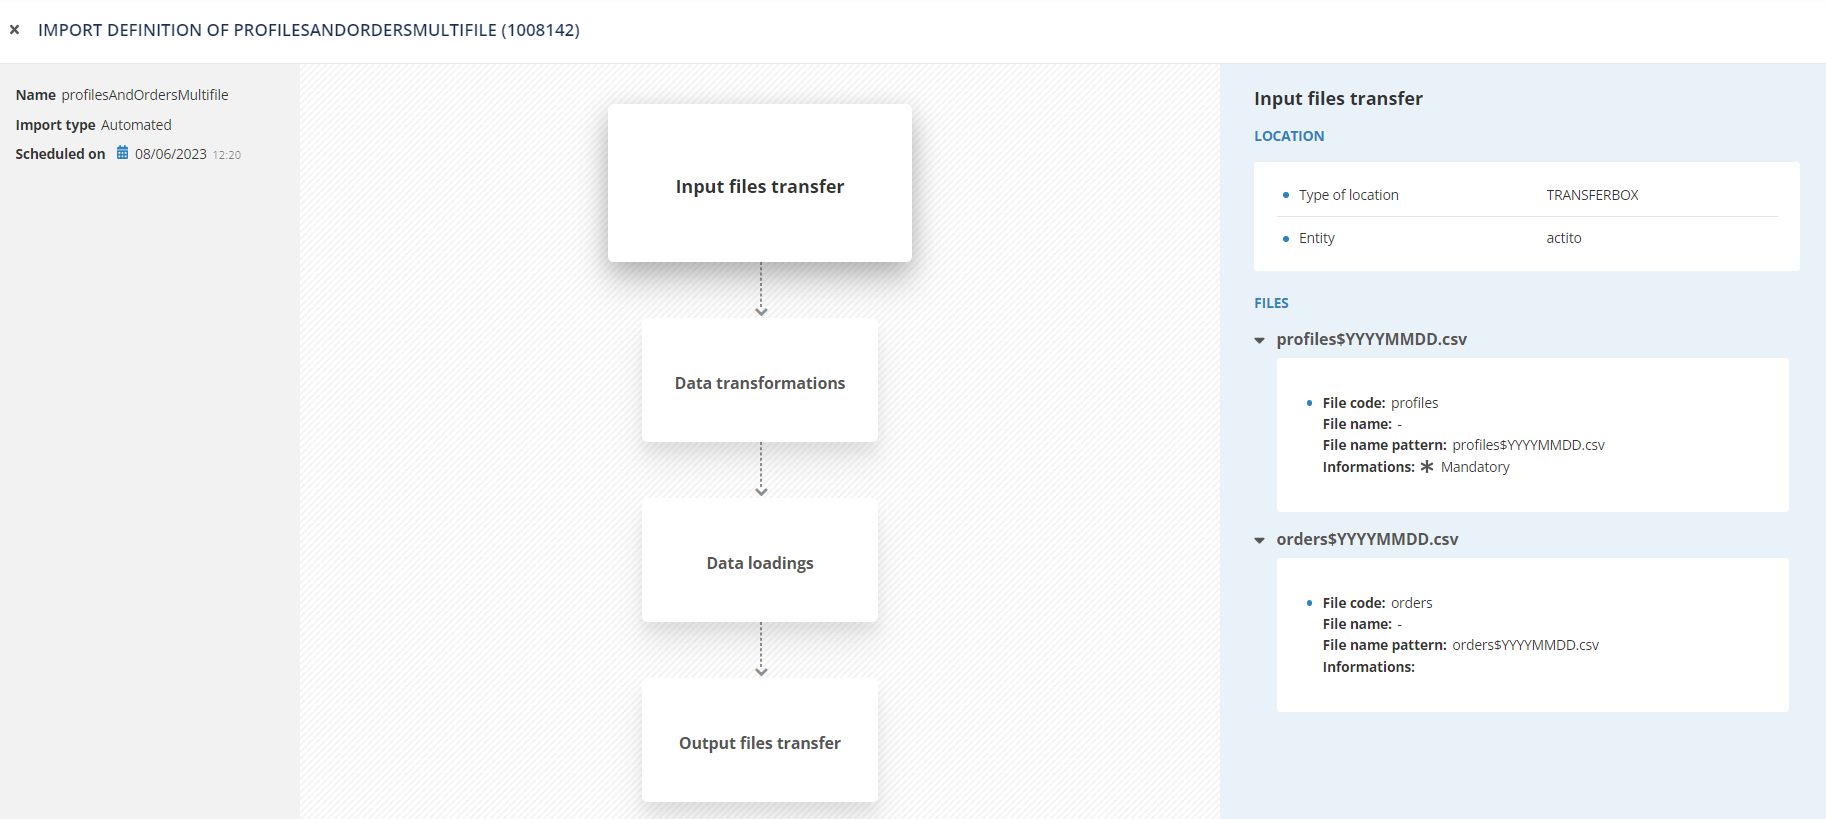
Click on the 'View import definition' to get an overview of the different steps of the import, as defined during the creation of the ETL synchronization.
This is very useful to get information about what is expected at each step. You can get a similar breakdown in the execution details of 'Finished' executions, with an added status for each step (see 'Finished execution' for detailed explanations about each step).
In progress executions
This tab contains imports that are currently running. While bigger files may take longer to integrate, you will only see data in this tab temporarily, just after the start of an execution.
This allows you to easily check if an import or a synchronization is still running and has not finished yet.
Admin and advanced users have the possibility to directly retrieve the file that is being integrated into Actito thanks to the 'Download input files'.

Thanks to the 'View execution details' button, you can also get an overview of each step of the import. As the execution is ongoing, the final status of each step might not be available (see 'Finished execution' for detailed explanations about each step).
Finished executions
This tab contains all the imports that have finished running: this includes both past executions of scheduled synchronizations and one shot imports.
The 'Finished' executions tab keeps 15 days of history for scheduled imports (ETLs) and 5 days for one shot imports.
This allows you to check when an import has been completed and when all the data have been integrated in to Actito. More importantly, you can check the Import result column to confirm whether the the import has succeeded or fell into error.
For scheduled imports, the technical name of the ETL synchronization is displayed in the Name column. You can use the 'Search' function to quickly find the executions of a specific ETL.
Check the 'Started on' date to find the execution on a specific day.

Admin and advanced users have the possibility to retrieve the file that was imported as well as the output files: depending on the result, it can be a result file, or an error file.
The output files of ETL synchronizations are only generated if the generateErrorFiles and generateResultFiles parameters have been set to true in the definition.
The error file can help you find the issue with failed executions to let you correct them.
For ETL synchronizations that fell in error (possibly because the file was not available in the cloud), it is possible to make a RELAUNCH by API.
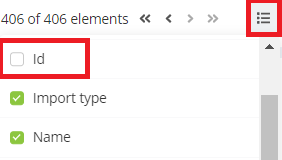
The relaunch requires knowing the original execution id. You can easily retrieve it by adding the "id" column in the top right corner.
Viewing the execution details
Click on the 'View execution details' button to get a detailed overview with the results of each steps.
On the right panel, you can see the schedule, start and end date of the execution, as well as its global status. It can be:
- SUCCESS: all the files were correctly retrieved and integrated into your license, without a single line encountering an error.
- IN ERROR: the import encountered a global error and didn't go through, meaning that not a single line was correctly integrated. This is usually related to the absence or the format of the files.
- WARNING: all (mandatory) files were correctly retrieved and they were partly integrated into Actito, but at least one line encountered an issue because it contained an invalid value.
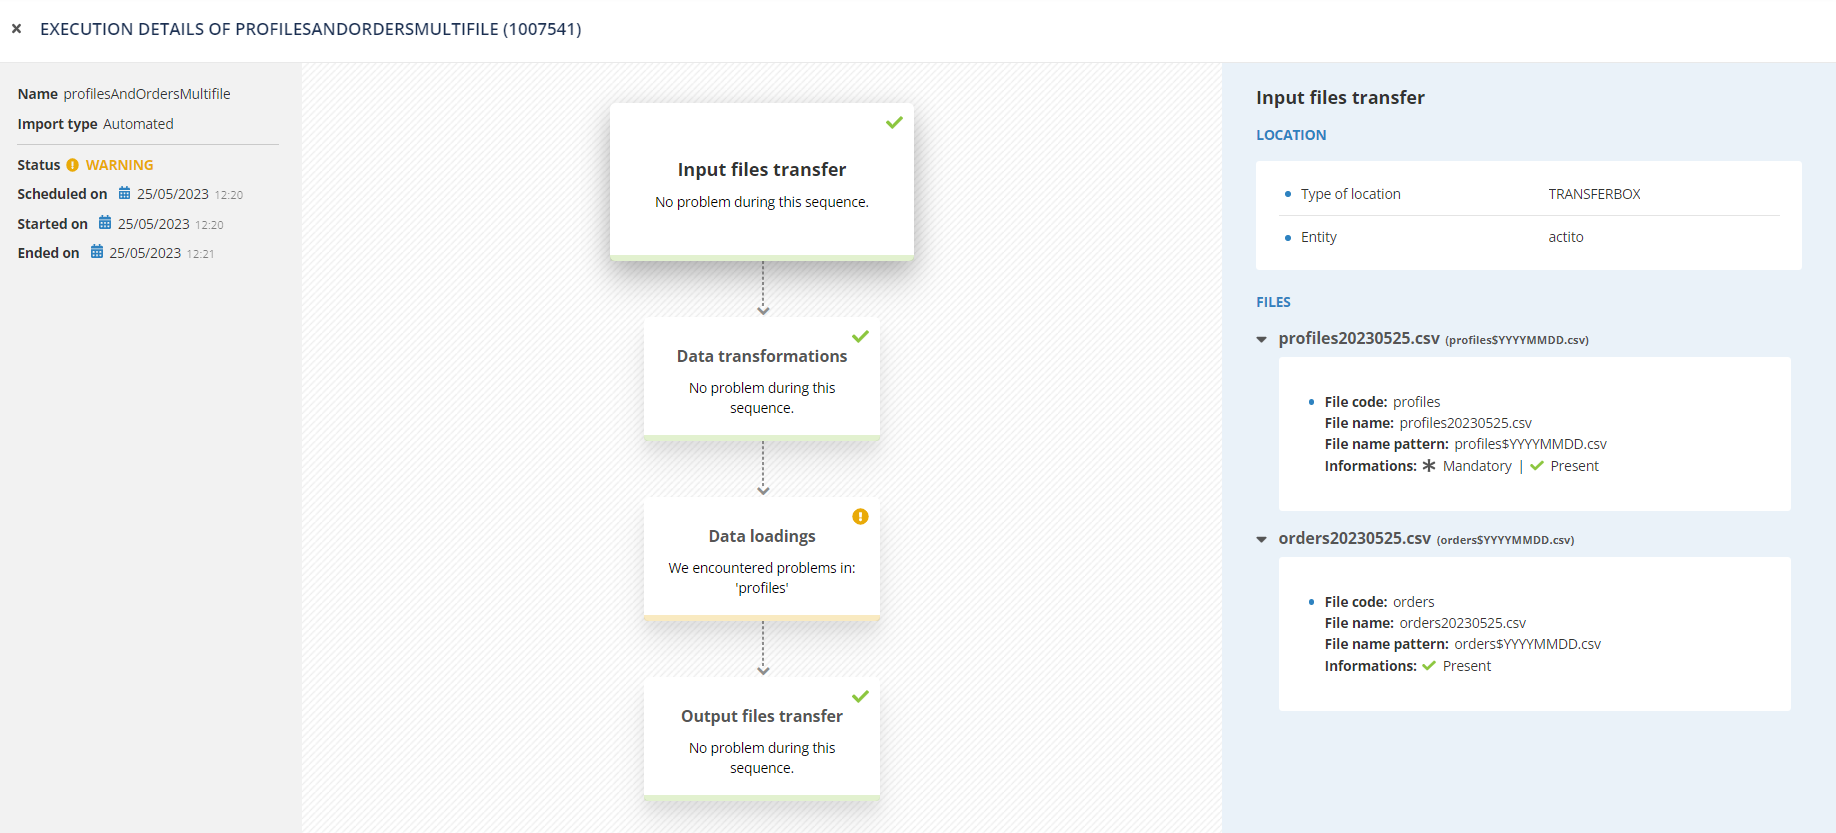
Each of the four steps has their own status.
Click on one of the steps to see its details.
Input files transfer
In this step, you can see the remote location where the file has been retrieved (in the case of an ETL).
You also have details about the files expected in the definition of an ETL, such as:
- The expected name pattern
- The name of the file for a specific execution
- Whether the file is mandatory for the execution of the import
- Whether the file was present in this specific execution.
This step will encounter an ERROR if the remote location (such as an SFTP or FTPS server) was not availalbe at the time, if the file was not found on the location (including if the file for the date pattern of the execution was missing) or if the file found in a zipped archive was incorrect.
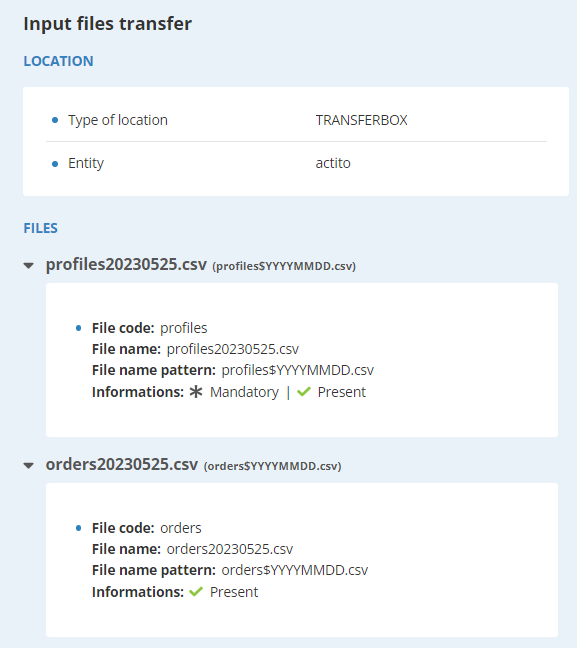
If a non-mandatory file is missing, this step will be marked as a SUCCESS.
Data transformations
This step gives your an overview of the transformations applied to the data.
It can only encounter errors if the value of the input does not match the value defined in the transformation .
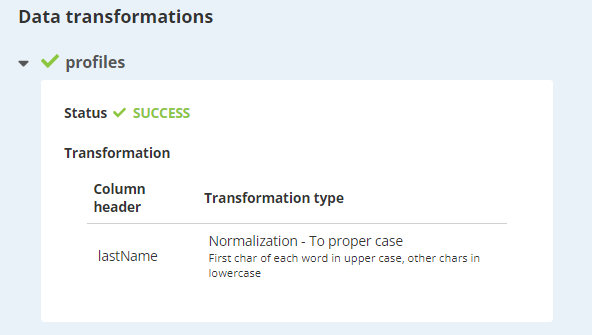
The 'data transformations' step is only present in ETL synchronization where transformations have been defined. It will always be greyed out for manual or bulk API imports.
Data loadings
This step if the most important one in the import: the actual writing of data in the license. In the case of a multifile ETL, you will have a status for each file.
You can first see the definition of the step:
- Click on the 'Mapping' icon to see the mapping between the headers of the input file and the name of the attributes in the table. You can also see the behaviour in case of empty, existing or invalid values, as well as multi-value attributes.
- The 'Parameters' toggle allows you to see the Writing mode (CREATE, UPDATE, CREATE/UPDATE, DELETE), and whether error and result files will be generated for this step.
The integration results give you information about the number of lines integrated into the table.
- The number of lines 'read' is the number of lines found in the files.
- The number of 'rejected' lines is the number of lines that contain an invalid value for the corresponding attribute (such as an invalid e-mail address, an invalid language code, ...). If there is at least 1 rejected line, the global status of the import will be in WARNING. You can download the error file to check the validation errors (provided that the generateErrorFiles parameter has been set to true)
- The number of 'inserted' lines is the number of lines that did not exist in Actito and that were created by the import.
- The number of 'updated' lines is the number of lines that already existed in Actito but for which a modification of data was found in the file. If you import a line that is identical to an already existing one, it will not count as an update. Hence the sum of rejected + inserted + updated lines may be lower the number of lines read, because some lines existed already without any update to their values.
- The number of 'deleted' lines is only applicable for DELETE type ETLs, which can only delete data without creating any new record.
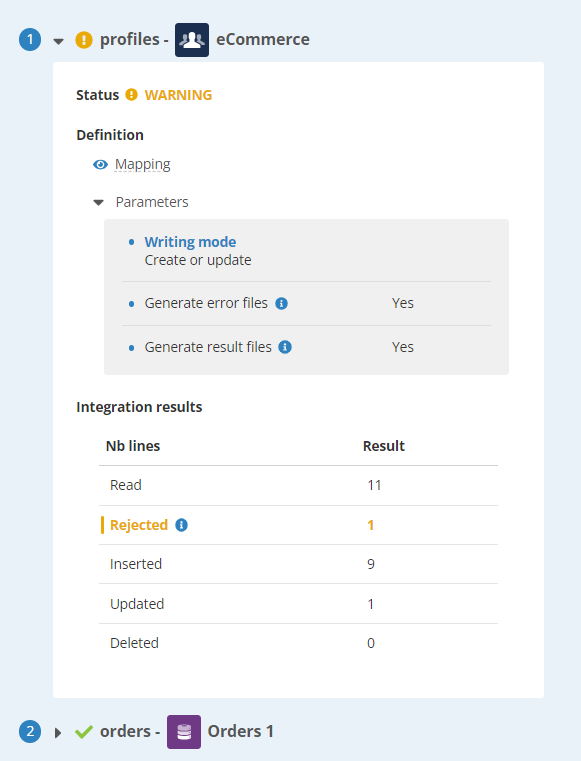
The execution details appear in a side panel. Click on the cross in the top left corner of your screen to exit it.
Output files transfer
The details of this step give you information about the possible output files generated, including:
- The remote location (FTPS, SFTP, Transferbox) on which the files have been dropped.
- The name of the files.
The output files of ETL synchronizations are only generated if the generateErrorFiles and generateResultFiles parameters have been set to true in the definition.

The execution details appear in a side panel. Click on the cross in the top left corner of your screen to exit it.
Retrieving output files
Admin and advanced users have the possibility to retrieve the file that was imported as well as the output files: depending on the result, it can be a result file, or an error file.
The output files of ETL synchronizations are only generated if the generateErrorFiles and generateResultFiles parameters have been set to true in the definition.
The error file can help you find the issue with failed executions to let you correct them.
It contains a replica of each failed row, but with 2 extra columns:
- "errorCode": This is the error code, which details the reason for failure.
- "errorColumn": This indicates in which column is the error.
If several columns fell into error for the same row, this row will be repeated once for each error.
The possible error codes are:
- "INVALID_FIELD_VALUE": The row value for the field indicated in the 'errorColumn' row is not valid, because the format is not compatible.
- "DATA_ALREADY_EXISTS": The error occurs in 'createOnly' mode when a row of the import file refers to a business key that already exists in the table.
- "UNKNOWN_DATA": The error occurs in 'updateOnly' mode when a row of the import file refers to a business key that does not exist in the table.
- "DUPLICATE_OBJECT": The error occurs because the new record contains an existing value for a unique attribute which is not the business key.
- "MISSING_FIELD_VALUE": The error occurs because the value for a mandatory attribute is missing.
Viewing the report
Click on a 'View report' button to access a copy of the execution report, identical to the one received by e-mail by the recipients defined in the parameters of the import.
It also displays the list of recipients.

The execution details appear in a side panel. Click on the cross in the top left corner of your screen to exit it.

