Setting up App Push Notifications in your Mobile App
This section summarizes the instructions to follow to set-up App push notifications and some useful advice.
This part focuses only on the setup of push notifications for your mobile applications.
Take a look at the Web section for website and browsers.
How to setup App push notification?
1. Go to Settings and click on “Platforms”

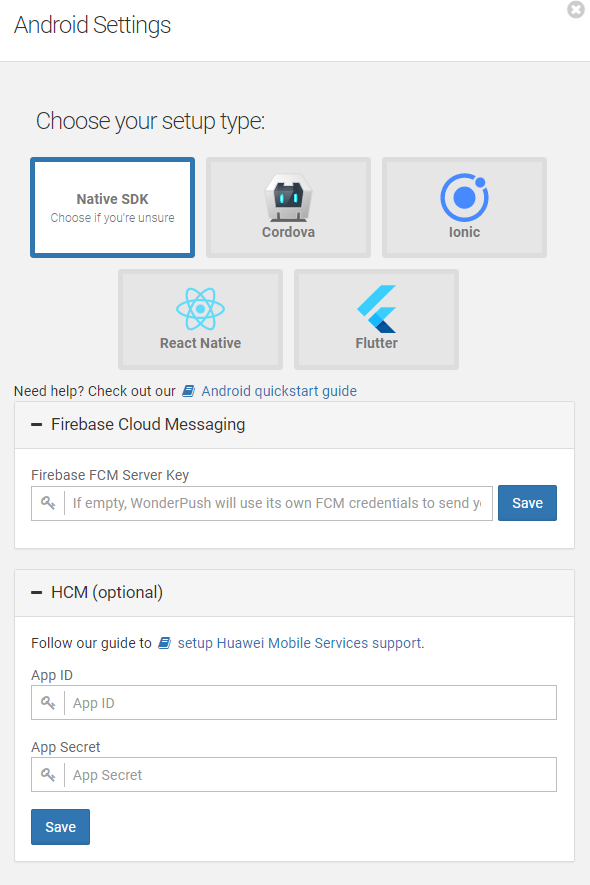
2. Click on “Setup IOS push notifications” or “Setup Android notifications”, select the right platform and follow the instructions
If you are unsure about the platform used, please choose the native SDK option, as it presents the main process for a general Android or IOS app.
If you have an app on both operating systems, you must repeat the process for each OS application. It’s also true if you use cross platform frameworks like Cordova, Ionic, React or flutter.

As the process differs greatly between Android and IOS, and between specific frameworks, please refer directly to the WonderPush documentation depending on the platforms relevant to your apps.
However, keep in mind that regardless of the OS, you should assign an end-customer “userId” to the subscribed device (see below)
App frameworks
Native platform
|
Platform |
Link to the WonderPush documentation |
|
Android |
https://docs.wonderpush.com/docs/android-push-notifications-quickstart |
|
IOS |
https://docs.wonderpush.com/docs/ios-push-notifications-quickstart |
Framework
|
Platform |
Link to the WonderPush documentation |
|
Cordova |
https://docs.wonderpush.com/docs/cordova-push-notifications-quickstart |
|
Ionic |
https://docs.wonderpush.com/docs/mobile-push-notifications-ionic |
|
Flutter |
|
|
React native |
https://docs.wonderpush.com/docs/mobile-push-notifications-react-native |
Assigning an end-customer "userId"
Regardless of the platform and OS, you also need to deploy a function to fill the userId when the end-customer is identified on the app.
As the code to assign the userId differs according to the platform, please retrieve the relevant snippet directly on: https://docs.wonderpush.com/docs/user-ids.
Then add it to the SDK that you will insert in your app.
This point is mandatory to trigger push notification message through the Actito journey builder towards profiles knows by Actito. As a reminder, it's mandatory that the userId is a key on Actito side (Attribute defined as unique).
How to set prompts to get permission?
-
On Android, the permission is given automatically when the end-customer installs the mobile app. There is no action to do.
-
On IOS, your IT team must choose when they ask the end-customers for permission.
This is done at the last step, when the developer installs the code of the SDK. A specific function is made to prompt for the permission. Where this function is inserted in the customer journey will determine when the users get the prompt.
Since the United States administration banned the possibility for US-based companies to do business with Huawei Mobile, there is a specific setting to send push on devices of this brand. Please, refer to https://docs.wonderpush.com/docs/huawei-mobile-services-hms-push-notification-support
Troubleshooting app push notifications
If you are having some issues, please refer to the WonderPush documentation: https://docs.wonderpush.com/docs/technical-issues
Checklist
|
Items |
Status |
|
I setup all dependencies to send push through my app according to OS app (firebase account, create Apple certificate...) |
|
|
I put the WonderPush SDK on my app |
|
|
I added the part to set one userId on the SDK |
|
|
For IOs, I defined where I get permission |
|
